

In
#christmas #2016 #house #ornament #handpainted #diy #blogger #blog #crafty #tennessee #copperboom #latergram #glassornament #jesus #happybirthdayjesus,
reason for the season
{he is the reason for the season}
I hope everyone has a truly magical Christmas! I was in bed sick all day yesterday but had to share this gem that santa left for me to remember where this journey began for #herlittlewhitehouse in TN.


I had to take a break from the #gilmoregirlsrevival to go pick up this beauty! I have been dreaming of this painting for over 2 years. I am missing my Nashville families something fierce and after my first full week at my new life in Omaha, this came in the perfect time! I seriously am so blessed. #copperboom "Protect her all the days of her life"
Check out this amazing artist at https://www.deanndesigns.com
You may have seen her stuff in pottery barn, William sonoma, or on HGTV.
What a whirlwind of week it has been. Since my last blog, I loaded my life into a Penske truck and moved back home to middle America. I was so blessed to have my parents come in town just in time for this trek. We loaded up on a Wednesday and drove the 700+ miles Thursday and Friday! My amazing family met us at the storage unit and helped unload all of my life into not one but two storage units before I settled in at my parents for the weekend.
Since then I have spent the time unpacking, visiting family, job hunting and mourning. I have created a little bubble around my self since I have been back, not allowing myself to think/talk too much about the move. If I talk about it, it becomes too much of a reality and I am not ready for that. My hope was that once I found a job and developed a new routine my heart and mind would settle down some more and that reality will be come easier to digest. I am 100% on board with the choice to move back. I have had multiple things happens since that have proven so, but it is still super hard to say goodbye to the life I created in Nashville and the career that I loved so much.
The good news is that I already found an AMAZING job and I will start this coming Monday( 4 days from now). I am beyond excited for this new adventure and opportunity for my soul and life to grow. Today I had plans to take myself to a internet cafe. It ended up being a Panera because I do not know of any fun coffee shops besides Starbucks. I did a little daily devotion to calm my soul and thought it would be a great opportunity to show you guys another fun piece of my home tour: living room series.

The Coffee table you saw in the living room post had quite a transformation. This will be a quick post, mainly because I did this table on a whim. Usually when that happens I do it with what I have, I don't ask for help and I make it work with what supplies I have. This time that wasn't the case. I just wanted it done.
 |
| Beautiful rug was made by a friend. She doesn't make them anymore but you can check out her blog here: wanderers hearth |

As you can see the table used to have a glass top. I had dreams of a black metal framed table with a gorgeous stained wood top. I gave myself my budget and started searching the internets. My budget for the whole table start to finish was 80. Which meant the frame had to be cheap because the wood would not be. The ones online are well over $150 so this was going to be a challenge.
I finally settled on this table. I got it from a guy on craigslist who was probably the biggest pot head EVER. He had it listed for $50. I offered $30 he said ok. For some odd reason when I went to pick it up, I completely forgot to stop and get cash so all I had was $20 and he was more than happy to give it to me ha ha!
SO I loaded it up. Mind you, the evening I picked it up, I was watching my friends little boy while she was in the hospital on bed rest with her last pregnancy. He had a tendency to get carsick in my car. So I used that as my excuse of why I forgot to get cash because I had to stop on the side of the road and clean up vomit all over my car. Plus I now had a naked kid in a carseat with me. He was either too high to care or just felt bad for me. Either way it worked in my favor.
I got the table home and realized it was a table for little people. Sitting on the floor it went to the middle of my shins. I instantly ran to home depot because I knew this wouldn't work for me and purchased some casters to attach to the bottom. Sadly since this was such a fast project I have no photos of that process or a price point. They were super easy to attach though and once I added them it added a good 4 inches to the table and I was pleased.
 |
| final choice |
 |
| My personal shopper at home depot |

 |
| The board before I glued them. |
Originally I planned on having a reclaimed wood top for the table. But after visiting a local wood shop and pricing it out I realized that was not at all in my budget. I told myself I would just do it at a later date if I loved the table enough. So I went back to home depot with my measurements and pieced together some finished boards and asked them to cut them to the length I needed. Grabbed some wood glue and headed home.
The next phase of this project still makes me laugh and had I not spilled soda on my computer I would have the photos to prove the hilarity in it hall. You will just have to take my word for it. When I have a project in mind I do not like to take my time on them. I NEED them done as soon as I start it or it will drive me crazy unfinished. The thought of waiting and doing it like any real craftsman would just wasn't an option. I laid wax paper of the glass top of the table, put glue on the side of the boards and pieced them together. Laid it down on top of the table the way I liked it and hoped for the best. The guy at home depot tried to convince me to buy clamps for the next part because the wood needed to be held in place while the glue dried or it would now dry flat and even. I humored him and walked over the the isle that sold the clamps. Saw the price of them and left without them as fast as I could. CLAMPS were not in my budget- so what is the next best thing? FLOWER POTS AND CINDER BLOCKS!
You heard that right. For 48 hours I had two cinder blocks and two 15 pound giant outdoor planters full of mums sitting on my coffee table weighing the boards down until the glue dried. While a couple of the boards are not 100% flat in some parts, for the most part- I have to say my plan worked!
After this, I let it sit for a few days until I decided what I wanted to do with stain. As I mentioned before my original plan was to have a black metal framed table and reclaimed wood on top. Looking at my living room I realized how much the black frame would stand out and decided to leave it silver. This meant I needed a good stain that would match the silver and not be too match to my mantle boards. Sadly I do not remember what color I chose, but it was a nice grayish Minwax stain.
I have to say it turned out pretty great and I get compliments on it quite often. I love looking back at these pieces and smiling at the process that was to get them where they are now. To me, that is way better than buying it from the store and being in the pore house ;). I hope you enjoyed this post. Stay tuned for more!


|
| Yes, its Gilmore Girls. Yes I am ALWAYS watching it. |
Well, aside from the arrows this is the most popular part of my living room feature. The mantle always seems to be the biggest conversation starter. So Today I will share its story :)
In my old townhouse I had dreamed of having a candle or wood filled fire place, something that could hide my cable boxes and modem. With most projects I give myself a budget and tell myself "if its meant to be- it will happen!". For months I looked on craigslist, checked out antique shops and googled for "THE" perfect mantle. Originally I wanted a old wood shabby chic one. I started to realize I wasn't alone in this plan and those do not come cheap.
I finally settled on one that I found on Craigslist. The seller was selling two, one white, one black. He was in the process of doing a flip and gutting a house, so he was selling them dirt cheap. My budget was $80. He had them listed for $90. I emailed asking about condition and such and asked if I could come look at them. He emailed me back saying he needed them gone fast because the ad had been up for a while and he would do a lower price. I countered back with 50. He agreed. When I got there to look at them I realized they were cast iron! I also noticed the white one that I told him I wanted was in pieces! He said when the demo crew took them off the wall the white one came off in 4 parts ( how it was installed). I would have had no idea how to put it together and was majorly bummed. I did not need/want a black one. I mentioned this to him and also mentioned how I was not prepared for a 100 pound mantle and would have to see if I could find someone to help me move it.

He ended up emailing me that night saying if I came to get it he would give it to me for free!!! I couldn't turn this down! I would find a way to make it work! I immediately called home depot, rented a truck for the hour and headed over there all by myself ha ha! When I got there the demo crew all just stood back on their lunch break laughing at me as I tried to figure out how to get said 100+ pound mantle into the truck. I turned and looked at them all sweetly and begged them to help me move it for $20. They kindly agreed! 3 men loaded it up and I headed home. Un aware of what to do next. I called my neighbor who has become my go to with house projects (without his permission). After some begging and pleading and bribing with beer I asked him to help me unload it. Like most projects I ask him for help with, he ended up doing it all on his own. I still do this day, after watching other movers move it have no idea where/how he found super human strength to do it.
Once we got it inside, he screwed it to a beam in one place and I was set. It then dawned on me that there was no way this beast was going to be taken back outside to paint so I had to paint it where it was installed. I had not yet discovered chalk paint, knew regular paint would chip so I headed to the hardware store in search of appliance paint. I kid you not... Left Home Depot with 4 cans of white Rustoleum white outdoor spray paint!!

I shimmied some construction paper and plastic bags under the bottom of the mantle and went to town. I still do not know how I did not gas myself out of my house. I would not recommend this to anyone. Major hand cramps and 6 (had to get two more) cans later this beauty was finished! She could probably use another few coats after my latest move but I am so in love with it. Through the years I have changed the look with it, from candles in the center, to wood in the center to now logs. Below you can see the changes of the fire place and different setting ideas. Then I will explain my process for my favorite/ current set up.


 |
| This is just pieces of different sized wood pieced together, hammered and stained to fill in the arch |

So as you can see from the top photo I filled my arch with wood logs. Something that is always shocking to people and a surprise to understand is that those logs are 3/4th to one inch pieces of branches cut up ha ha! When I was home for Christmas last year I shared with my Granny and Papa how my dream mantle would be filled with what looks like fire wood. When I bough the mantle I had visions of having a three detention fo-wall in the arch lined with houndstooth tile or barn wood, but after many trips to home depot, and MANY discussions with the men there they talked me out of it every time. I do not have the tools or the budget to do this, plus the depth to the wall was not as deep as I had envisioned so nothing would have been able to sit inside the fireplace anyways. So what is the next best thing?! Firewood!
 |
| My Pappa cutting tree branches from a family friends yard. |
To start, I bought an extra tall trifold poster board. Target was the only place I could find one tall enough but so many supply and craft stores have them in different sizes.
Then I slide the poster board behind the mantle. I have 2 inch gap between the mantle and the wall how it sits. I traced the arch of the mantle and pulled the board back out.
Took the board outside and sprayed the poster board black, inside and a bit outside of the traced arch. That way if there are any gaps in the wood it will be dark and not be noticeable on depth.
After that dried I attached the wood pieces. First I laid them all out on the board how I would like them and went through and glued them down. I had to do this part in two steps because I ran out of wood. The first time I attached the pieces I used a glue bond that I had in my house from an old project on my coffee table (next post) It probably wasn't what I should have used, but as we discussed I wanted to stay on my budget. The second time I used my hot glue gun. I would not recommend that. The strings where everywhere and they are not as bonded to the board as they could be and in time will snap off with the glue.
The best part of this project is that it slides in and out for easy access to my outlet and cable box :) No more wires, bulky boxes.
Below you can see the photos of the the process and a close up :).
 |
| attaching my first few. You can see the spray paint edge on the bottom left. |
 |
| I actually liked the look with it not all the way full while I waited for my next wood delivery ;) |
 |
| The finished product! |
My 3 legged helper.
In honor of hitting 200 followers on Instagram I thought I would do my first house tour post :)
With my life in boxes and less than three weeks before my big move it only makes sense that look back at these photos and remember the beauty where the blog was inspired!
What better room to start with than my most favorite room. Well, that isn't true, my fav room in my house is my bedroom because I live in my bed when I am home. My living room is my pride and joy when it comes to decor.
The main feature of my living room seems to be my cast iron mantle. I bought this mantle on craigslist for my old house and it has a story of its own. I can not wait to share that store in a feature blog that will detail the progression of it.
 |
| It Is Well sign made by GypsyLaceDesigns |
The week after I started this blog I found out that the owners of my cute little white house are selling. Putting my heart back together, I had to go into planning mode and figure out what is next in my story.
After a lot of soul searching and praying I decided that while I have to already move, I am going to move back home. This has been something that has been on my heart for a little over a year. Something that I just kept putting off. With changes in jobs, changes in housing and other family moving back home, God kept giving me signs and chances to take the leap.
With that being the case, as you can already tell it has slowed down my ability to work on this blog. I have been packing, planning, and spending time with friends here in Nashville before I leave.
The purpose of this blog will stay the same. Sadly it has to be a different vision for now. I still plan to do a house tour of my little white house, but sadly it will be a bit different after that.
This sign is a sneak peek you will soon see in the official launch of the blog. One of my favorite parts of the house. It is one of two beautiful signs made by my dear friend at GypsyLaceDesigns. I can not wait to share the story behind these signs and show you how beautiful they looked in the room!
I am still extremely excited to share this journey with you all and can not wait to see what the future brings for me!
I am keeping the faith and believing in his plan.
"You write all of the best stories, so take my pen and write mine for me..." Kolby Koloff- Settle
In
#upcycle #playroom #decor #nursery #littleboy #littleman #boymom #studio #carnival #relaxing #cozy #diy #woodfloors #vynl #art #crafts #newpaint #behr #behrpaint #marquee #rug #target #ikea #toys,
Studio makeover
A photo posted by Shala (@herlittlewhitehouse) on
In
#coffee #herlittlewhitehouse #fuel #drinkofchoice #coffeeaddict #morning #thursday #grind #diy #house #white #decor #decorate #blog #blogger,
#herlittlewhitehouse
National Coffee Day
A photo posted by Shala (@herlittlewhitehouse) on
In
#coffee,
#diy #sheets #beds #house #herlittlewhitehouse #marthafreakingstewart #blue #newsheets #growingup
grownup life
A photo posted by Shala (@herlittlewhitehouse) on
Naptime means cleaning time at#herlittlewhitehouse!! My parents are in town this week so the house is getting a deep clean!
How do you prepare for company?
How do you prepare for company?
Who has a green thumb?! I do not. I have to repot "Uncle Jerry"( named by the kids) and I am scared I am going to kill him. Any tips or tricks I should know?! #herlittlewhitehouse needs some green in it!

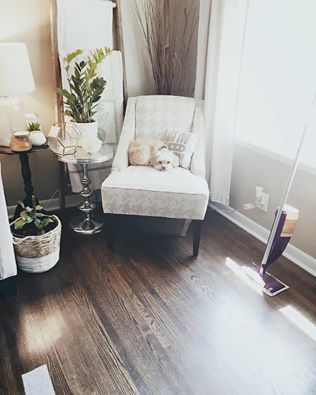
A house isn't complete without a furrbaby to share it with. This 12 year old beauty right here is the reigning queen at #herlittlewhitehouse and we are so thankful for her on #nationaldogday.

Hello!
I created this blog as a fun way to showcase the many projects that I have done. If you do not know me, you will soon! I am the type of person that has to always have a project, mainly they involve things around my house. I take pride in making my house a home and welcoming for all that enter the front door. I can not wait to give you a tour and an idea of where my inspiration comes from.
Feel free to subscribe below so you can join me in this journey. I am learning as I go- but my hope is to help give other people the motivation and drive to create or customize some of the many projects as their own! I plan to share some of my favorite ideas, projects and inspirations along the way. I can not wait!
Have a blessed day!
Shala


